PreReceipt
Contents
REQUIRED FIELDS FOR PRERECEIPTS
Donor/Vendor
Warehouse
Original (Ref) Name
QUICK START:
Process Description:
Prereceipts can originate from various applications in P2: Prereceipts, Routes, Agency Pickups or Purchase Orders.
The main difference between a prereceipt and a receipt is that a prereceipt does not affect inventory.
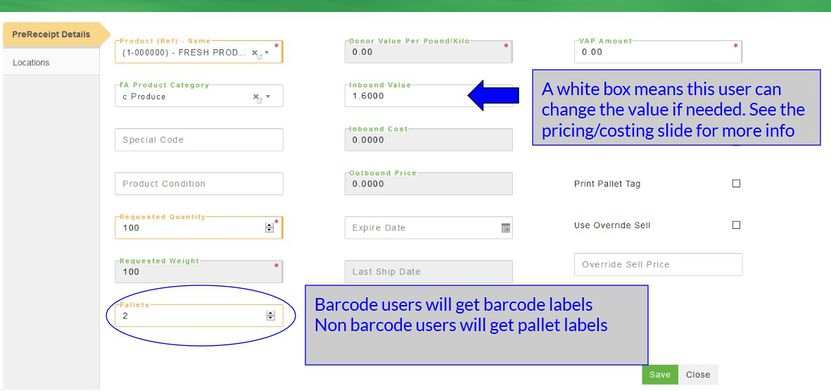
The purpose of a pre-receipt is to enter what you are expecting to receive. The person(s) in charge of picking up or receiving the products uses the pre-receipt to verify what product and quantity are expected from the donor/vendor. When the product arrives at the warehouse the actual product/quantity are verified and the prereceipt is marked received which turns the prereceipt into a receipt. A prereceipt can also be converted into an order. If you forget to check "Convert to Order" the receipt also has that option. The product costs/values are determined by the product setup, however, the food bank administrator can give permission to certain users that allows for an override on the price/value of a product. If you need permission to change the prefilled value/cost see your administrator.
Not all steps in creating a prereceipt are completed at once. For instance a prereceipt is created for a product, however until the product is actually received it will appear in the PreReceipts to Receive tab. Once a prereceipt is marked as received a receipt is automatically created and the product is put into inventory.
Purchase Orders are for products the food bank requests from a Vendor/Donor.
PreReceipts are for products/quantities that you are expecting.
Receipts are preceipts that have been marked as physically received at the food bank (they are part of the inventory).
Process:
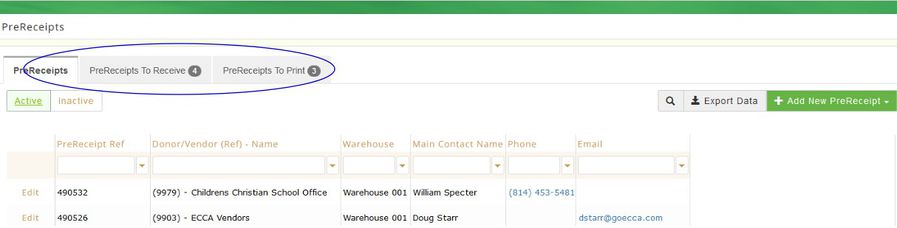
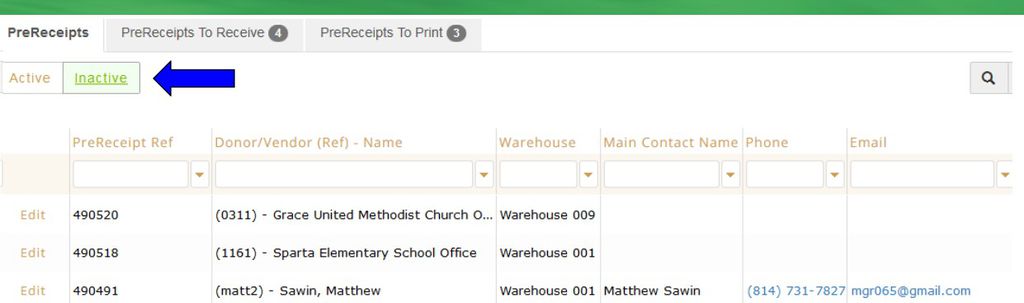
The main page displays all Active PreReceipts. There are options to view the Inactive prereceipts as well as to perform an advanced search, export data and to add a new prereceipt. There are three tabs, the number in the tabs represents how many prereceipts are in that status. For instance if there is " 4" in Prereceipts to Receive tab then there are 4 prereceipts you haven't received yet. It is not necessary to print prereceipts in P2 as it was in Classic. Non Bar code users can still print pallet labels and add product locations. A prereceipt must have a default origination code. That can be set at the donor/vendor level or you can leave it blank there and set it on the prereceipt level. The products you add must be the same type of donation, you would not want to put purchased product on a prereceipt with USDA. Basically, all USDA or all TEFAP or all Purchased. The default origination determines where the QPR gets its data.
EDIT/VIEW RECEIVE AN EXISTING PRERECEIPT
Locate the prereceipt, click Edit and a new page opens the prereceipt details. Click the Options tab and Operations to see more detailed information. The Line Items tab will display all the products on the precreceipt. Any changes must be Saved.
PRERECEIPT STATUS/CHANGE STATUS
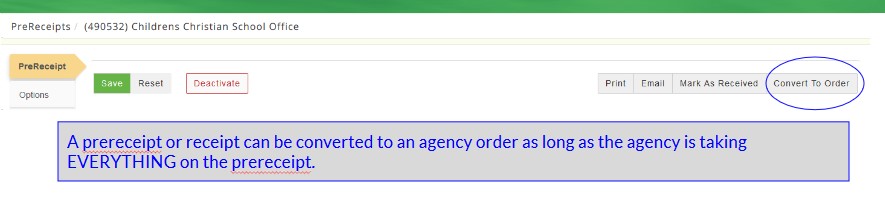
To update the status of a Prereceipt, locate the prereceipt and click Edit, there are options to Print, Email, and Mark as Received or to Convert to Order (if the food bank is taking the whole truck load to one agency or if an agency is going directly to the donor and getting the product themselves vs. using the Agency Pickups application). Another way to update the prereceipt depending on its status is to locate it under the Prereceipts To Receive tab or the Prereceipts To Print tab. Once the prereceipt is received it becomes a receipt and can be found in the receipt feature of Primarius.
ADD A NEW PRERECEIPT****
There are several steps to create and receive a prereceipt. Detailed instructions follow below.
- Click on +Add New PreReceipt
choose Add New Product Donor PreReceipt or Add New Vendor PreReceipt. (Use the advance search option to locate the Vendor/Donor with the Name field) Then click Save and the line items page will display.
******When you create a prereceipt it is recommended that you should use donors for "free" products and vendors for purchased product.****
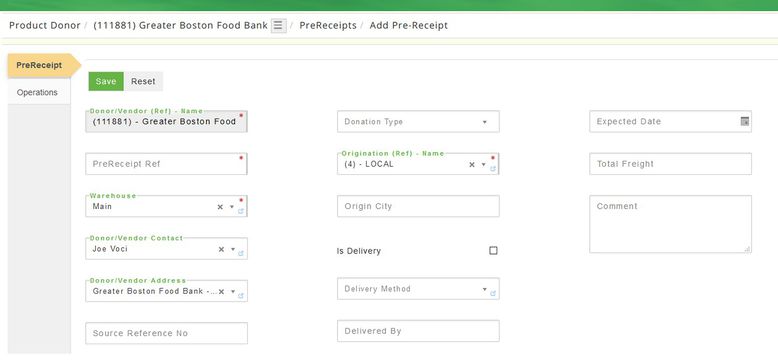
- Complete any fields on the Operations tab then click Save a messages displays The record was saved successfully and the Line Items page displays.
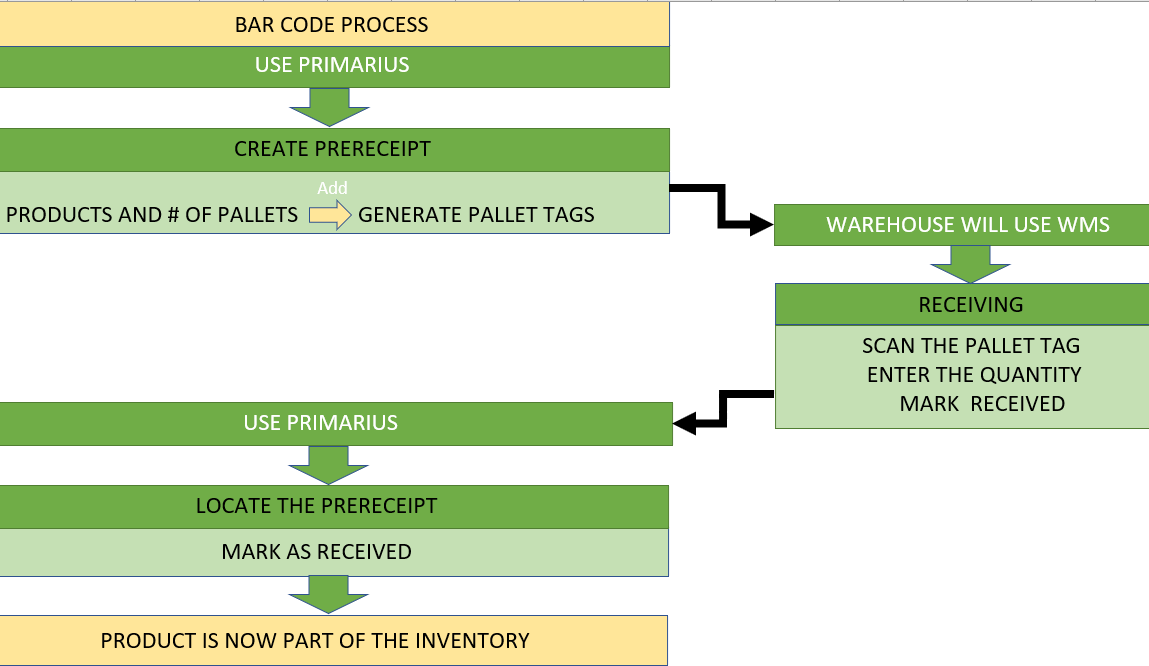
- Click on +Add New PreReceipt Detail ******* non barcode and barcode users: if your food bank uses bar coding be sure to enter the number of pallets that are needed for the products (see the bar code note below) this will allow you to create the pallet id labels. OTHERWISE THIS FIELD IS OPTIONAL IF YOU WANT TO PRINT PALLET TAGS and you're a non bar code user. Then click Save a message displays The record was saved successfully. After all products have been added click Close.
ASSIGNING PALLET TAG/LABEL
PRINTING BAR CODE LABEL/TAG
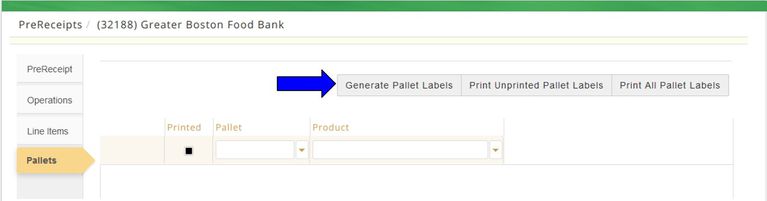
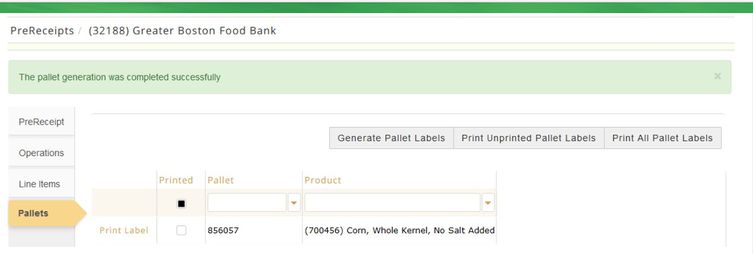
Once you assign the number of pallets on the line items tab you need to create the pallet numbers, a new tab appears on the left called Pallets. Select the Pallets tab and click Generate Pallet Labels, they can be printed now or when the prereceipt has been marked received, the tags can be printed from the receipt as shown below.

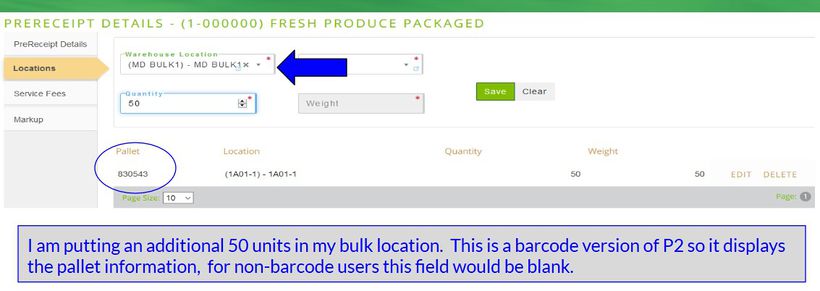
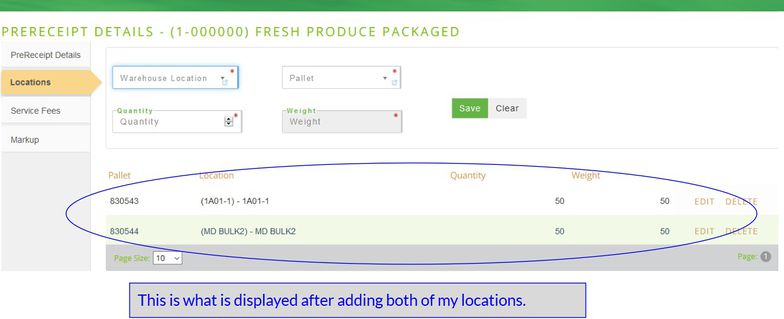
USING THE LOCATIONS TAB
This is ONLY for physically receiving the product into inventory. When the product shows up to the food bank you can select the locations tab and choose the location(s) for the product and the quantity to put in each location. Do not use the locations tab until the products show up because you cannot deactivate the products once you tell P2 that it's physically in a location.
Once the product is received click Edit and select Mark As Received or from the Receive tab, locate the order and check the box and click Receive Transaction ; a message displays The transaction was successfully received.
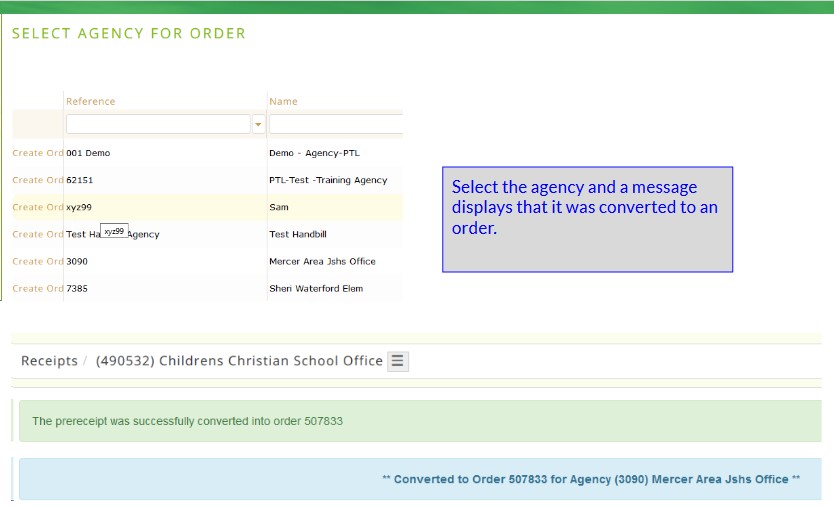
- If the food bank is taking the entire prereceipt to an agency then use the Convert to Order. Select the Agency and a message displays The prereceipt was successfully created into order (order # will display). The food bank still receives credit with Feeding America for the poundage for facilitating the transaction.
NOTE: BARCODE USERS
Make sure to enter the # of pallets to create for each line item added. After all products have been added then select the Pallets tab and click Generate the Pallet Labels. There are options to Print Unprinted Pallet Labels (in case you added more pallets) and to Print All Pallet Labels. If you will be using mass prereceipt print pallet tags then do not print the pallet labels from here. The Mass Receipt Pallet Tags allows you to print multiple tags all at one time for mass prereceipts. See Knowledge Base under Internal Programs for a step by step guide.
A Prereceipt should not be marked as received when using the bar code software until the products are scanned and received into the warehouse then the prereceipt can be marked as received.
DEACTIVATE/REACTIVATE
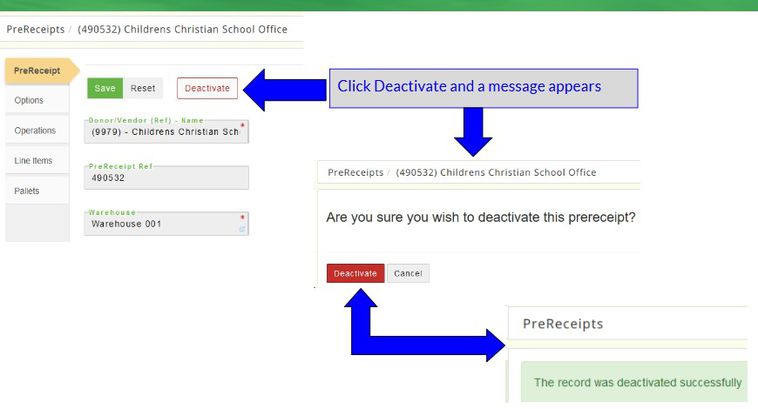
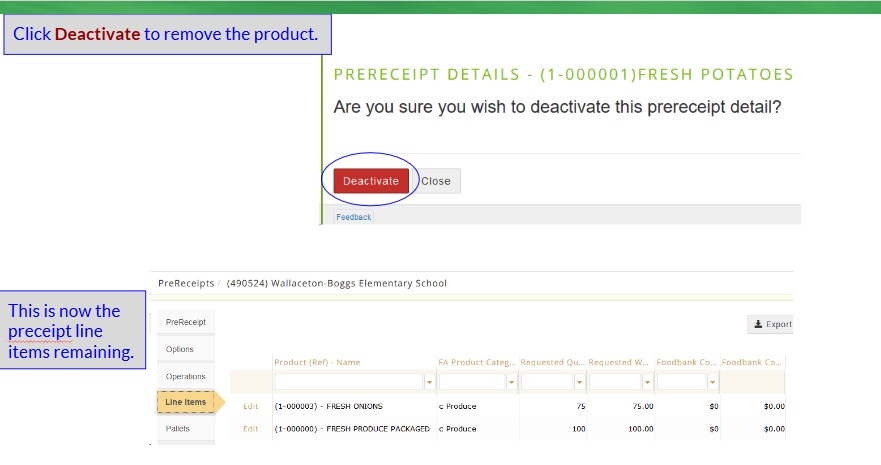
To deactivate or cancel a PreReceipt from the Active tab click Edit and a new page opens the prereceipt detail. To cancel the entire prereceipt click on Deactivate, the system prompts Are you sure you wish to deactivate this order? Click Cancel to return or Deactivate to continue and a message displays The record was deactivated successfully.
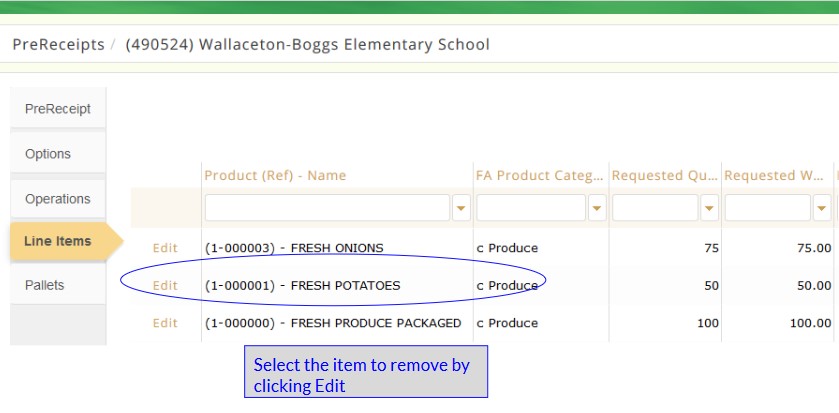
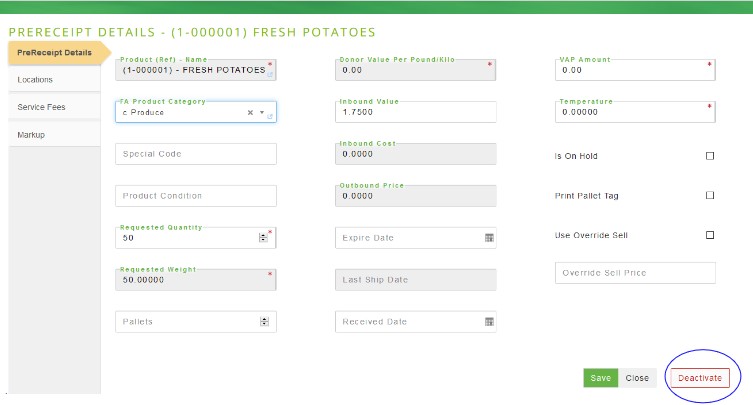
If there are only certain items that need to be canceled open the prereceipt and click Edit, then choose the Line Items tab, find the product(s) that needs to be removed and click Edit and the PreReceipt Details page opens, click on Deactivate
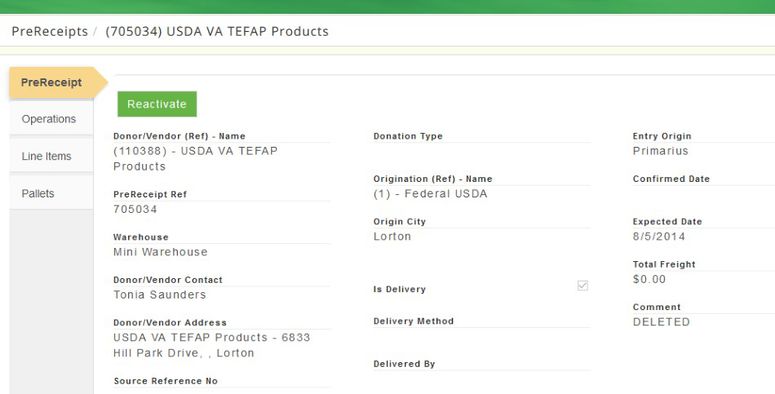
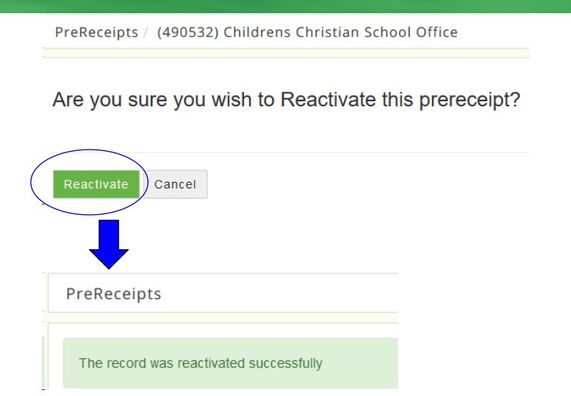
To reactivate a prereceipt from the Inactive tab locate the prereceipt, click on Edit and the prereceipt information page opens, click on Reactivate.
All items marked with a * must be completed. Dark grey boxes are view only and cannot be changed.
Field Definitions: Right click on the link to open it in a new tab
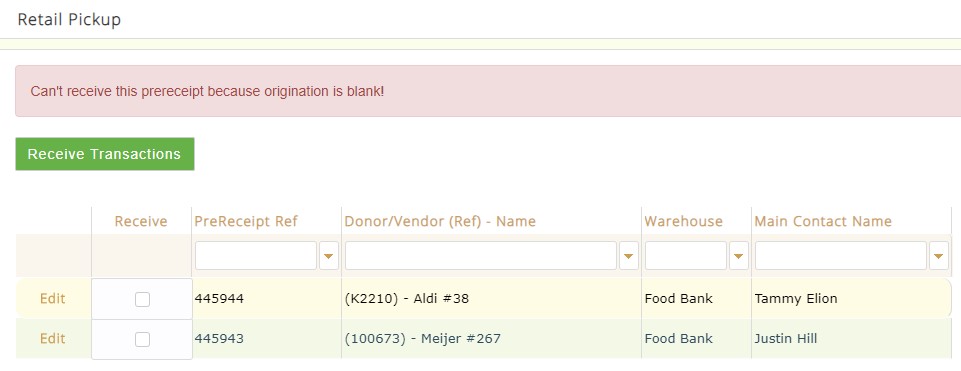
ERRORS:
Since the default origination field can be left blank for a donor/vendor (if they have multiple donations type you can leave blank and set it at each prereceipt) when you use Routes for retail pickup and food rescues or there are agency pickups, the system will throw an error that you must add the default origination type before the prereceipt can be converted to a receipt.