Warehouse
Contents
REQUIRED FIELDS FOR WAREHOUSE
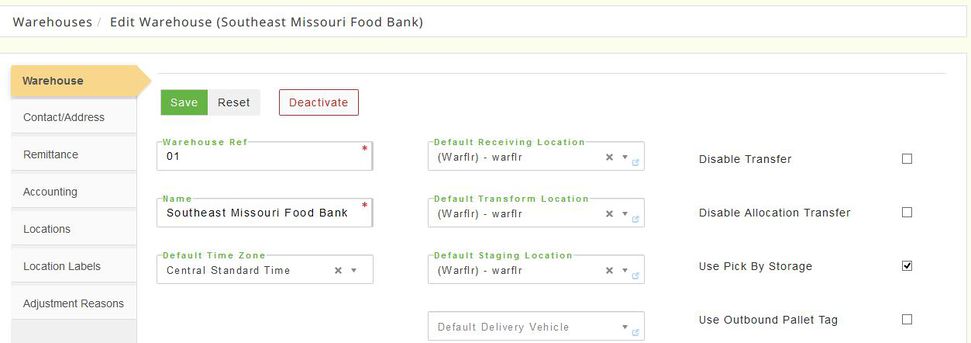
Warehouse Ref (created in Inventory - Warehouse)
Name
Address/City/State
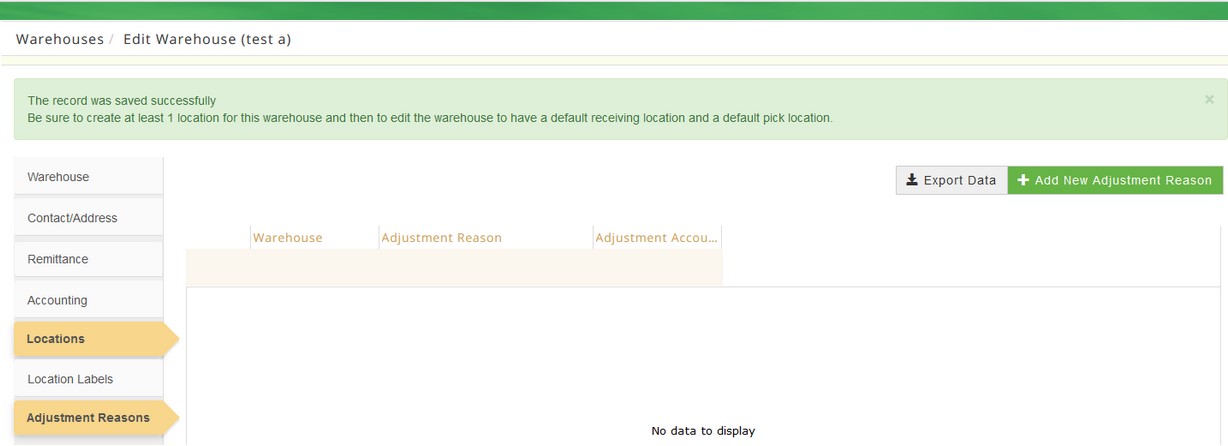
Adjustment Reasons
Process Description
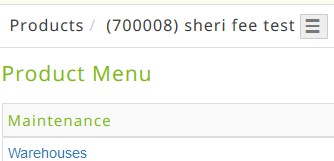
The warehouse is not the same application at the product warehouse found using the hamburger from a specific product. If you want to select locations for a specific product in the warehouse, make selections of which warehouse a particular product can/cannot be ordered from please use the product hamburger.
Process:
The main page of the Warehouses screen will display all Active Warehouses set up in the system. There is an option to view the Inactive warehouses as well as to perform an advanced search, Export Data and add a Record. Every warehouse has a reference number and is assigned a name. Within each warehouse are the locations that have been set up. Not all food banks will use multiple locations, if that is the case you can set one location to Pick and one for Bulk. If your food bank uses locations it's very important that you set up your locations so they are clearly understandable to everyone at the food bank. For instance, your food bank may have shelving that is 3 tiers high, a lower tier, a middle tier and and upper tier. You will also need to distinguish the left from the right or north/south, east/west however you are setting up your aisles. So you could have a location 1s-001 and name that location section 1 south front and call it a pick location and then 1s-002 and name it section 1 south middle and call it a bulk location. OR maybe you have your aisles lettered so 1A-001 could be lower shelf front, 2A-001 could be middle shelf front. Just make sure every location has a unique identifier, that every location has a name that helps to explain the location and that you're consistent with the naming process.
Orders CANNOT be picked from a "Bulk" location. Every product in your warehouse should have some quantity (or all ) in a pick location. On the same token you should not have multiple pick locations for the same product. Let's use a 3 tier shelf for example. The first level is on the floor and your workers can easily get to it, that would be a "pick" location. Maybe the 2nd tier is eye level and still easily accessible so that could be a "pick" location. Now the 3rd tier you need a piece of equipment to reach it, that would NOT be a pick location that would be a bulk location, where you could store excess products that later will be moved to pick locations as part of the replenishment process (the product on the first or second level is getting low so you'd use the system replenish process to move from Tier 3 down to Tier 1 or Tier 2).
All Warehouses need to have an adjustment reason added to them even if you do not use our GL export feature. This would include any adjustment reasons that are not system generated from a conversion from Primrius Classic. Some examples would be Food Box IN, Food Box OUT, Transform IN, Transform OUT, Work in Progress, Disposal for Waste, Disposal for Pig Feed, Over/Under Inventory, etc.
EDIT/VIEW
Locate the warehouse then click Edit, a new page displays the warehouse details such as the name of the warehouse, the default receiving location. Click Save if any changes are made.
ADD NEW
Click +Add New Warehouse and complete all fields in the General, Contact/Address, Remittance and Accounting tabs then click Save. After the warehouse has been created and saved the locations tab opens. Click +Add New Warehouse Location to create locations within the warehouse for your products. Each location should have a reference, a name and it must have a location type ID such as pick or bulk.
-
-
-
- IMPORTANT NOTICE**** When you first start to create a NEW warehouse at the bottom of the page is a box called Uses all Products. If you are creating a large warehouse and most of your products can be in that warehouse then check this box, it will take a few minutes to copy all of the products (NOT QUANTITY JUST PRODUCTS) to that warehouse. IF you are creating a Food Rescue or Mobile Pantry then it's best NOT to use this check box because all products are not a food rescue. Therefore you can go to each product that is a rescue or mobile pantry and add the warehouse manually to the product warehouse location=-see the screen shots below for clarification:
-
-
BEGINNING PAGE FOR CREATING A WAREHOUSE-IF you click on another tab this feature is no longer available!
Once you click Save the Warehouse Locations tab will appear. You must have at least one location in a warehouse. There is no limit on the number of locations. If setting up a new warehouse give some thought to your numbering system; Aisles, Rows, Tiers, etc. so that if the employee is looking for location A1-01 there is a clear understanding of where that is. This will reduce the amount of time searching for products in the warehouse.
ADDING A WAREHOUSE TO A SPECIFIC PRODUCT (e.g. Food Rescue/Mobile Pantry).

DEACTIVATE
To deactivate a warehouse from the Active tab click Edit and a new page opens the warehouse information, click Deactivate. The system prompts Are you sure you wish to deactivate this warehouse? Click Cancel to return or Deactivate. and a message displays The record was deactivated successfully. A warehouse cannot be reactivated.
If you use Food Rescue or Mobile Pantry you should have a warehouse dedicated to each of those. You can use whatever name you want for reference but even just Food Rescue and Mobile Pantry will suffice. Each warehouse should have 1 location and there's no limit to the locations. For example, you could create a Mobile Pantry Warehouse and you could have multiple trucks (locations) so you'd have Produce Truck, Freezer Truck, Truck #1, Truck #2 so when you're doing a warehouse transfer to get products out of your main warehouse location you might move them onto Truck #1 that's going out today, or transferring the produce truck that's going to the town square for a dropoff to the community, etc. By creating a separate warehouse for your pantry or rescue you'll eliminate the possibility of seeing ALL available inventory at the food bank since you will sign in to that warehouse when using the rescue/pantry. This will make it easier on your drivers as well as who may log into the pantry/rescue to process pickups/orders. Remember the drivers' permissions are set up by your food bank administrator so they can be limited to what they view, again making it easier for them to navigate around.
Here is an example of a driver logging on with limited access:
Fields marked with a * must be completed. Dark grey boxes are view only and cannot be changed.
Definitions: Right click on the highlighted word to open in a new tab
Adjustment Reasons These are created in the system element setup but still need to be added here.