Grants 1
Contents
- 1 REQUIRED FIELDS FOR GRANTS
- 2 Process Definitions:
- 3 A GRANT CAN BE ADDED TO AN ORDER EVEN IF THE ORDER HAS BEEN CONFIRMED. WHEN THE POST TO THE GENERAL LEDGER RUNS IT WILL USE THE DATE THE GRANT WAS APPLIED TO THE ORDER NOT THE ORIGINAL ORDER DATE
- 4 Process:
- 5 Field Definitions: Right click on the highlighted word to open in a new page
REQUIRED FIELDS FOR GRANTS
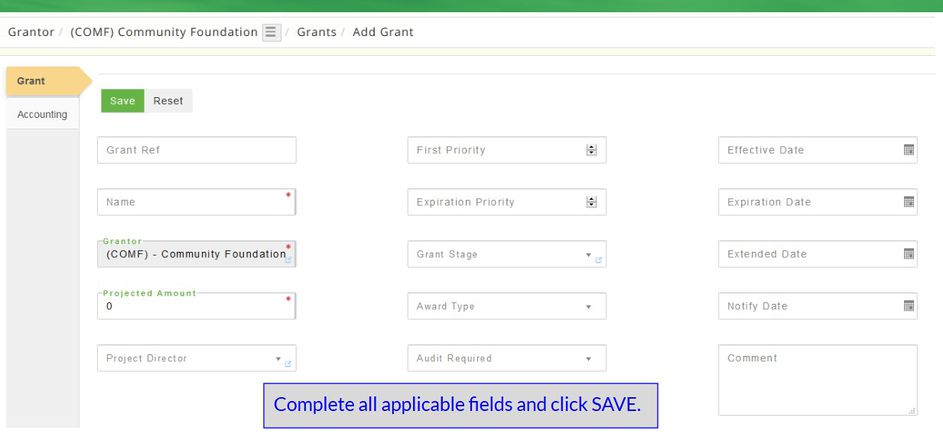
Name
Projected Amount
Grant Revenue GL Account
Process Definitions:
Grants are monies given to the food bank and can be used one of two different ways depending on the designations set up. When grants are created, the grantor is identified and the projected amount of the grant is added. Once the grant is created it must be allocated using Grant Allocations (how is it going to be used-apply to service fees, apply to costs, etc.). When the allocations are created they can be set to the food bank, agency use or a combination of both. For instance, the food bank may have money granted to itself to buy products, supplies, pay for postage, etc. After the grant and grant allocations are set up all eligible agencies and all products categories covered must be added. If in a future date more monies are received for a grant, a new allocation must be created with all eligible agencies, categories, etc.
A GRANT CAN BE ADDED TO AN ORDER EVEN IF THE ORDER HAS BEEN CONFIRMED. WHEN THE POST TO THE GENERAL LEDGER RUNS IT WILL USE THE DATE THE GRANT WAS APPLIED TO THE ORDER NOT THE ORIGINAL ORDER DATE.
Process:
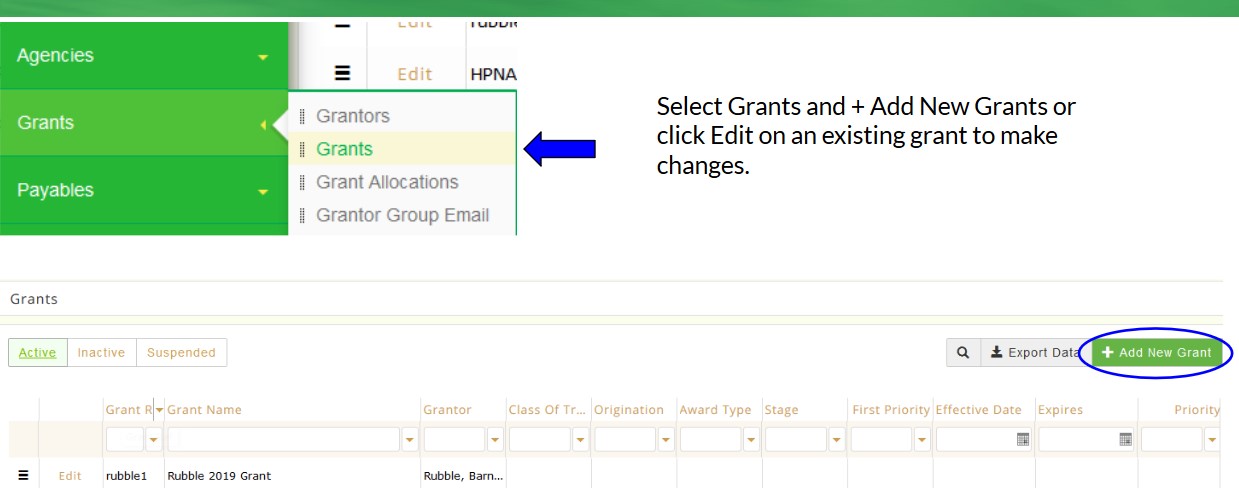
The main page displays all Active Grants. There are tabs to view the Inactive and Suspended grants as well as options to perform an advanced search, export data and to add a new grant.
EDIT/VIEW
There are two ways to edit/view information about the grants either through the Edit menu or the = Hamburger Menu. There are options to Suspend the grant and to copy the grant information to another grant.
HAMBURGER
The = hamburger gives users quick access to add/edit specific details about the grants. Locate the grant then click the = Symbol. There are two options to choose from Maintenance and Lookup. Select what to display such as Grant Payments, a new page displays the Open payments. There is an option to view the Posted and Inactive payments. Select the contact to view/edit from the grid and click Edit, make any changes then click Save and a message displays The record was updated successfully.
EDIT MENU OPTION (the Hamburger menu can still be accessed anytime using the = next to the grant name in the dialogue box).
Locate the grant then click Edit and a new page opens the grant details. The Accounting tab contains information about the GL Account, Equity Account and GL Asset being affected by the grant. If changes are made click Save and a message displays The record was updated successfully.
Grant
Displays the basic information about the grant.
Accounting
Displays what GL accounts are affected by the grant.
ADD NEW GRANT

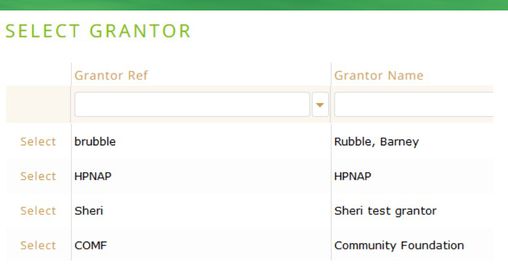
Select the Grantor.

+Add New Grant The accounting tab is not used at this time. After you click Save a message displays The record was saved successfully and the grant is now displayed on the active page. In the dialogue box are the options to navigate to the Grants page, to the name of the grant or to the Grantor page. The Grant Allocation can be set up directly from this page by clicking on the = select Allocations.from under Maintainence.

DEACTIVATE A GRANT
Locate the grant from the Active tab click Edit and a new page opens with the grant details. Click Deactivate and the system prompts Are you sure you wish to deactivate this grant? If no click Cancel to return to the previous page. If yes, click Deactivate and a message displays that The record was deactivated successfully.
You can only deactivate a grant that has NOT been used, ie. you created it incorrectly. If a grant has been used and you no longer want it to appear on the 'active' tab the only option would be to suspend the grant. This will not affect any past transactions for that grant.
COPY GRANT
To copy the grant information to a new grant locate the grant, click Edit, click on Copy and a new page opens with the grant details. This is used if funds are received from the same source on a regular basis and each time the same agencies qualify for it. Click Copy and a new page opens, complete the Grant Reference, Name, Effective Date and any Expiration Date then click Save and a message displays The grant was copied successfully. NOTE: Before you copy a grant update the dates otherwise the old dates (possibly, expired) will populate in the new grant.