Route
REQUIRED FIELDS FOR ROUTES
Name
Description
Process Description:
Routes are very flexible and time saving and are used for food rescue and retail pickups. Product donors, Agencies and products are added to the route based on the selections used in their setups. When you add a donor or product to a route it does not mean you have to go to them each time, they just are available on that route.
To see a flow chart of the process click on the link below:
Process:
The main page displays any active routes. There is an option to view inactive routes, to export date and to add a new route. The food bank driver has access to the routes through a mobile device and is given information on where to pickup and/or where to drop off products. A product must be flagged for food rescue if it's going to be part of a rescue (usually these are specific products) and/or retail pickup and a product donor must be flagged for retail pickup and/or food rescue and an agency must be flagged for food rescue if it's allowed to get rescued food.
THE EASIEST way for your driver to use a route is to set up a limited permission user for the driver giving access to things like Routes, Mobile Pantry, Agency Orders, Food Rescue, etc. This way the driver doesn't see a confusing list of P2 menus that he will not be using (grants, payment, general ledger, statement generation, etc.) It's a good idea to have a virtual warehouse created for your routes like Mobile Truck Warehouse. If you're doing mobile pantries you can transfer products from your main warehouse onto your truck (this limits what inventory is made available to agencies whereas if the driver logged into your main warehouse he'd see 4000lb of meat but in reality his truck might only have 200lbs on it!). Also if your driver goes out with an empty truck for the food rescue no products will show up available until he picks them up from the donor and then he can only give out what he gets.
VIEW/EDIT
Locate the route, click Edit and a new page opens the route info and a details tab. If any changes are made click Save.
ADD
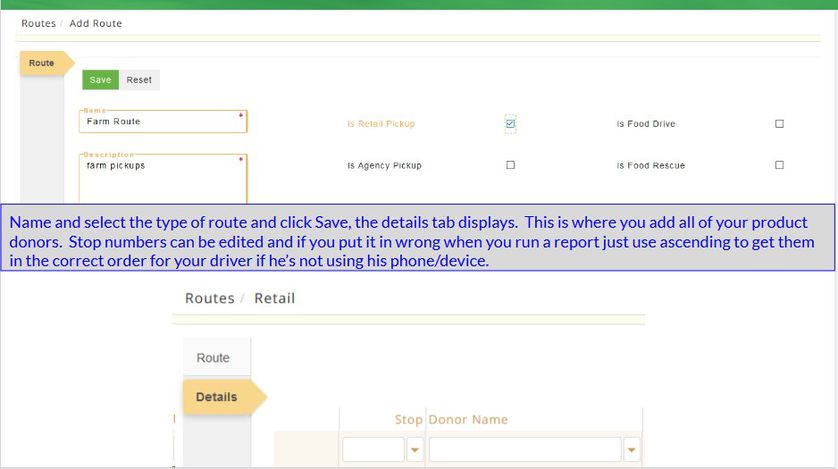
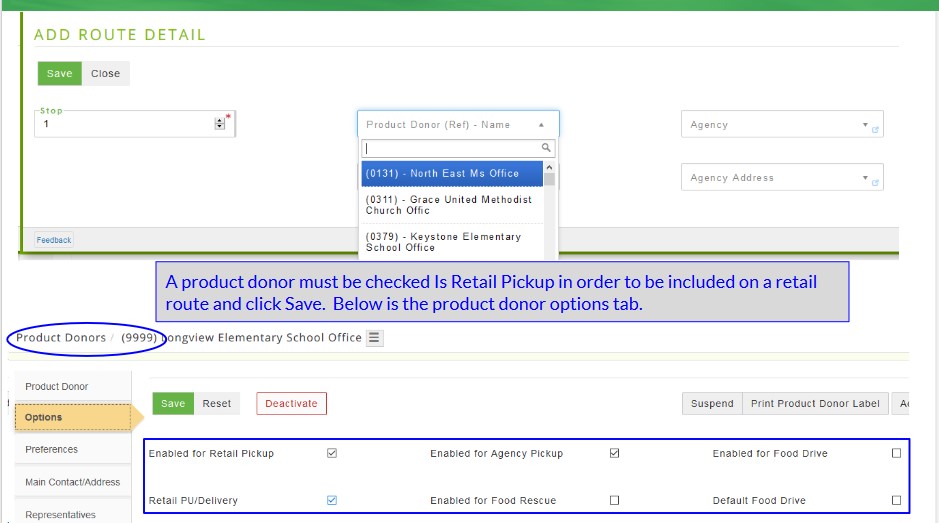
Click +Add New Route and a new page opens, type in a name and description for the route then select the Route type. Select the Details tab and click + Add New Route Detail. The first (1) stop is populated, select the Donor or Agency (you cannot select both for one stop!) then click Save. Put a 2 in the stop box and again select the vendor or agency. Continue to add all stops for this route, then click Close to return to the Details tab. After verifying all the stops have been added click on the Route tab and select Save and a message displays The record was updated successfully. In order to add the routes, the agencies/vendors/donors involved must have permissions set up in their profile by the food bank that allows them to be included in retail/agency/ vendor pickups/food drive/retail pickups, etc. For instance, when setting up a Product Donor you must check mark Is Retail Pickup in order for them to appear on the route's list of available donors. If you forget to add a donor in a route you can add them and assign the same stop # as another route, then sort them ascending to descending.
Name Enter the name for the route.
Description Enter any description for the route.
Is Retail Pickup Check if this route is used for a retail pickup. This will create a PreReceipt in the Retail Pickups feature of Primarius. Once the product is picked up check the Retail Pickup and marked received.
Is Agency Pickup THIS IS NOT USED AT THIS TIME.
Is Food Drive THIS IS NOT USED AT THIS TIME.
Is Food Rescue Check if the product is from a Food Rescue (if you are creating a food rescue route be sure to include the donors and all agencies that participate in food rescues). This creates a prereceipt then converts it to a receipt and creates the agency order that just needs confirmed.