Allocation Group
Process Description
Allocation Groups are used with the Inventory Allocation (known as batches in Classic Primarius) and Allocations to determine how the allocations are used. All allocations must include the agency(ies) and products and how to allocate them: warehouses, counties. (The FA/FBC type is designed specifically for Canadian Food Banks that use allocations and is not meant for food banks in the U.S.). Your food bank can have multiple types of groups. A product can only belong to 1 allocation group but an agency can belong to multiple groups. IF you want to keep a product from being allocated you CAN go to the product and select warehouse and choose Can Not Allocate OR you can check Can Not Allocate from the Product Warehouses tab.
One thing to understand about Allocations in general, The GROUP is the top of the pyramid under that would be the allocation(s) and then the Allocation Inventory which then causes an Agency Order to be created which can be viewed under Agency - Orders.
Here is an example to follow and there are more detailed instructions at the bottom of this page:
Everyday we do a daily allocation so we:
1) CREATE THE ALLOCATION GROUP
We create an Allocation Group called "Daily Allocation" (remember names are arbitrary, it must mean something to your food bank for identification). In that group we CAN add all 20 products but if we want to create our first allocation for only products to distribute on Monday allocation then we will only check the products to include in the group. You can have multiple Allocation Groups. Maybe you have products that you want to include in a KIDS SUMMER allocation. ( What is important is that you understand that a product can only belong to 1 GROUP. So if you're planning on using the same product on multiple groups you'd have to uncheck it from one group and then add it to the other group. While this is time consuming it will allow you to do it.) You must then add the 30 agencies that can get the daily allocations. It doesn't mean all 30 agencies will get something, it's just that they participate in the Daily Allocation group.

Here is using the same group "Daily Allocations" but I removed some of the products that I do not want to include on my "Friday" allocation.
2) CREATE THE ALLOCATION
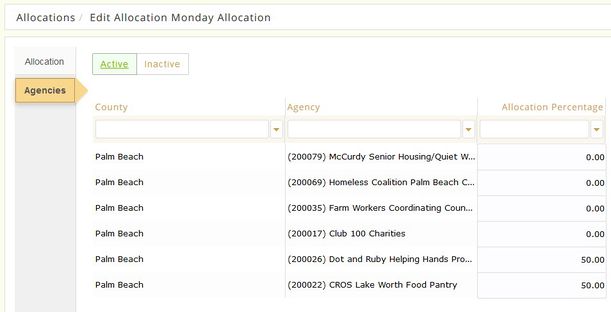
After the Allocation Group is created we then create an Allocation. If we do daily allocations for different products/agencies we can create an allocation called Monday and select the agencies (from the Daily Allocation group) that are going to be allocated products on Monday. If you selected agency % then you'll assign the percentage of inventory to give to each agency. In this instance we are only allocating products to 2 agencies and giving them each 50% of the allocated inventory.
3) CREATE THE ALLOCATION INVENTORY
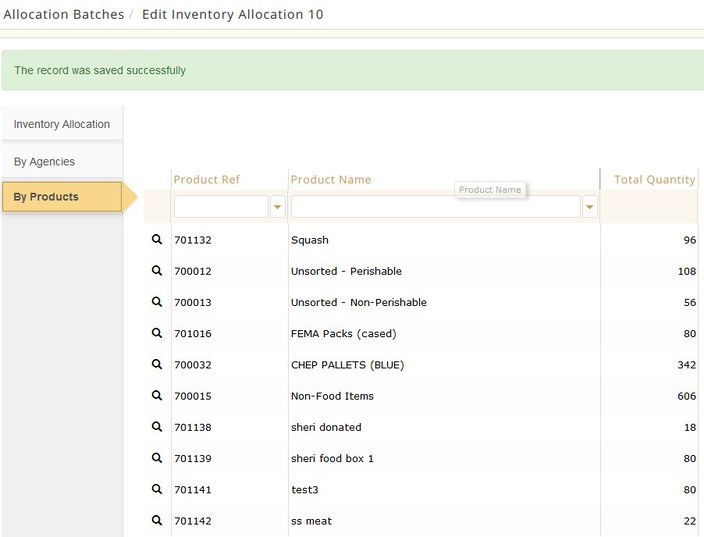
When you're ready to allocate your inventory, select the correct allocation to use and then generate the orders. Only the agencies that you selected in the Allocation will display. Check the ones you wish to order for Then Generate the Orders. Here you will see all of the products/quantities that have been ordered for the agencies based on the allocation we set up for the Monday Allocation using the group "Daily Allocations".
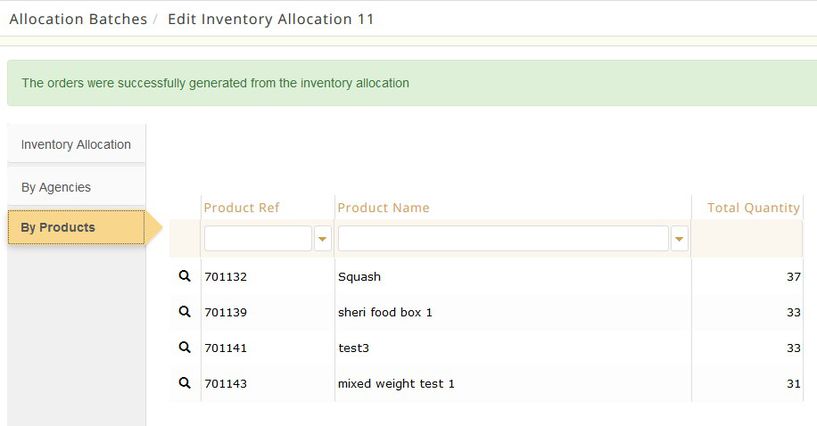
Here is the order using my Friday Allocation-you can see there are less products allocated since I removed some from the group "Daily Allocations".
You can now view the orders in Agency Orders where you can make changes if necessary before confirming the order.
Process:
The main page displays all Active allocation groups. There is a tab for the Inactive as well as options for exporting the data to excel and for an advanced search.
EDIT/VIEW
Locate the group and click Edit and new page opens. Select from the choices on the left to view/change what is included in the allocation group. If any changes are made make sure to click Save on the Allocation Group tab.
ADD NEW
Click + Add Allocation Group and create a reference, name and description for your group and click Save. A new page displays with multiple tabs. Allocation groups can be created by Products, Product Warehouses, Agencies, Counties and FA/FBC types. It's up to you to determine which would work for your food bank.
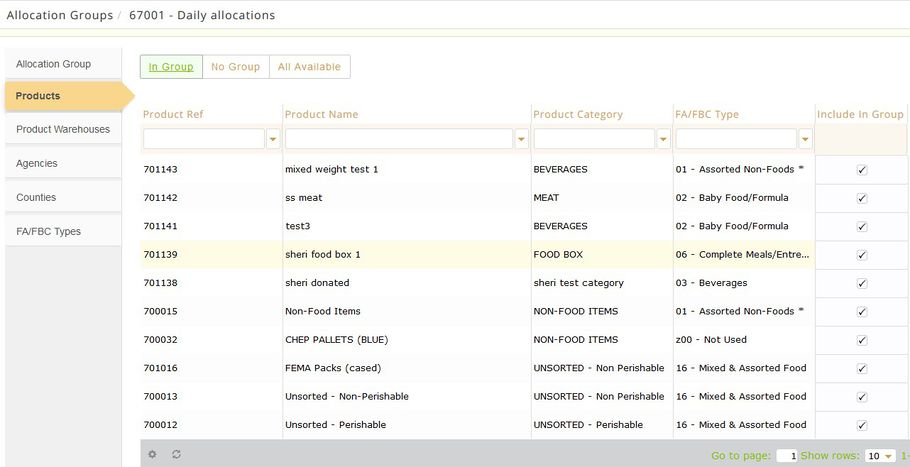
PRODUCTS TAB - this is where you will add the products that are going to be part of this group. To add products to your group click on the No Group to find all products that have not been assigned to any other group yet and check the products you want to include.
In Group (will be blank since we are just creating a new allocation).
No Group this displays all products that are not part of an allocation group yet (a product can only belong to 1 group).
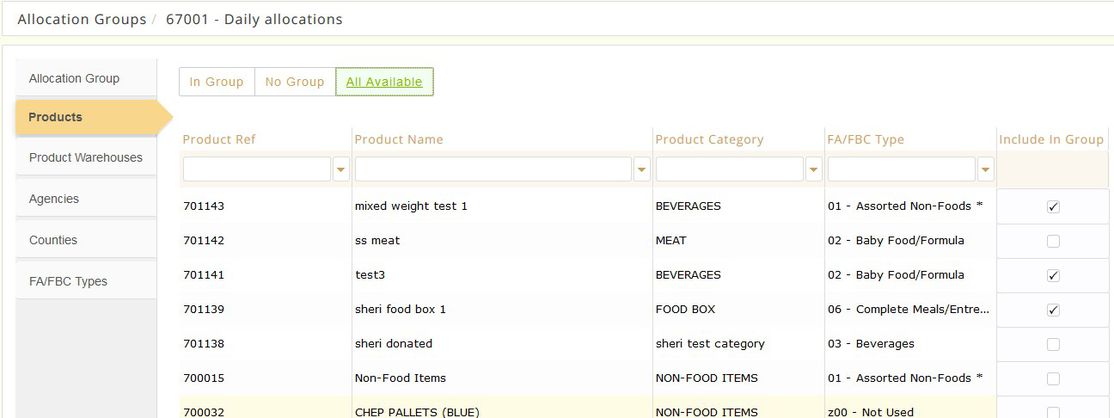
All Available this displays all products that are available to be included in this group (including any that you just added which will have a check mark for Include in Group).
PRODUCT WAREHOUSES tab all warehouses display with products. The main page shows all products that can be allocated. You can check any products that you do not want to be allocated and they will then show up in the Can Not Allocate tab. This is not the same thing as the Products tab. You may have a product "milk" and it's located in warehouse 1 and warehouse 2. " Milk" is going to be allocated, however we only want to allocate it from Warehouse 1 so we would add a check mark (Can Not Allocate) to the "milk" in warehouse 2.
Can Allocate displays all products that be used.
Can Not Allocate displays all products that cannot be allocated.
All displays all products that can and cannot be allocated.
AGENCIES tab if you want to do an allocation click + Add New Agency to Group. A new page displays a drop-down, select or type the agency and click Save. Continue to add all necessary agencies then click Close.
Active/Inactive displays (will be blank since we are creating a new group).
COUNTIES tab If you want to do an allocation by County click + Add County to Group, add the county and percentage of inventory for that county and click Save. Continue until all needed counties have been entered, click Close.
Active / Inactive (will be blank since we are just creating a new allocation).
FA/FBC Types if you want to do an allocation by FA/FBC type click + Add FA/FBC Type and select each type to include in this group. THIS IS SET UP FOR CANADIAN FOOD BANKS AND DOES NOT APPLY TO U.S. FOOD BANKS/FEEDING AMERICA
Active/Inactive (will be blank since we are just creating a new allocation).
DEACTIVATE
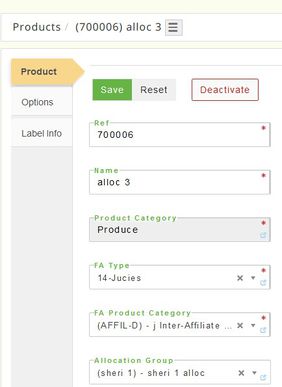
Locate the group and click Edit then select Deactivate. The system prompts Are you sure you wish to deactivate this allocation group? Click Cancel to return or Deactivate to continue and a message displays The record was deactivated successfully. If you deactivate a group it DOES NOT remove the group from the product, therefore the product will not be available to add into another group. You need to go to the product setup and from the products tab -Allocation Group- remove or change the group.